> ## Documentation Index
> Fetch the complete documentation index at: https://requestly-mintlify-changelog-requestly-past-week-38456.mintlify.site/llms.txt
> Use this file to discover all available pages before exploring further.
# Send API Request
> Simplify API testing with Requestly's API client. Send HTTP requests, view responses, and add parameters.
***
The API client in Requestly allows you to easily send API requests, without the need for writing code or using a terminal. It lets you test APIs, retrieve data, and explore how they work by simply creating a request, clicking Send, and viewing the response within Requestly.
This feature is perfect for developers testing API endpoints during development, QA engineers validating API responses for edge cases, and support engineers debugging API issues in real-time.
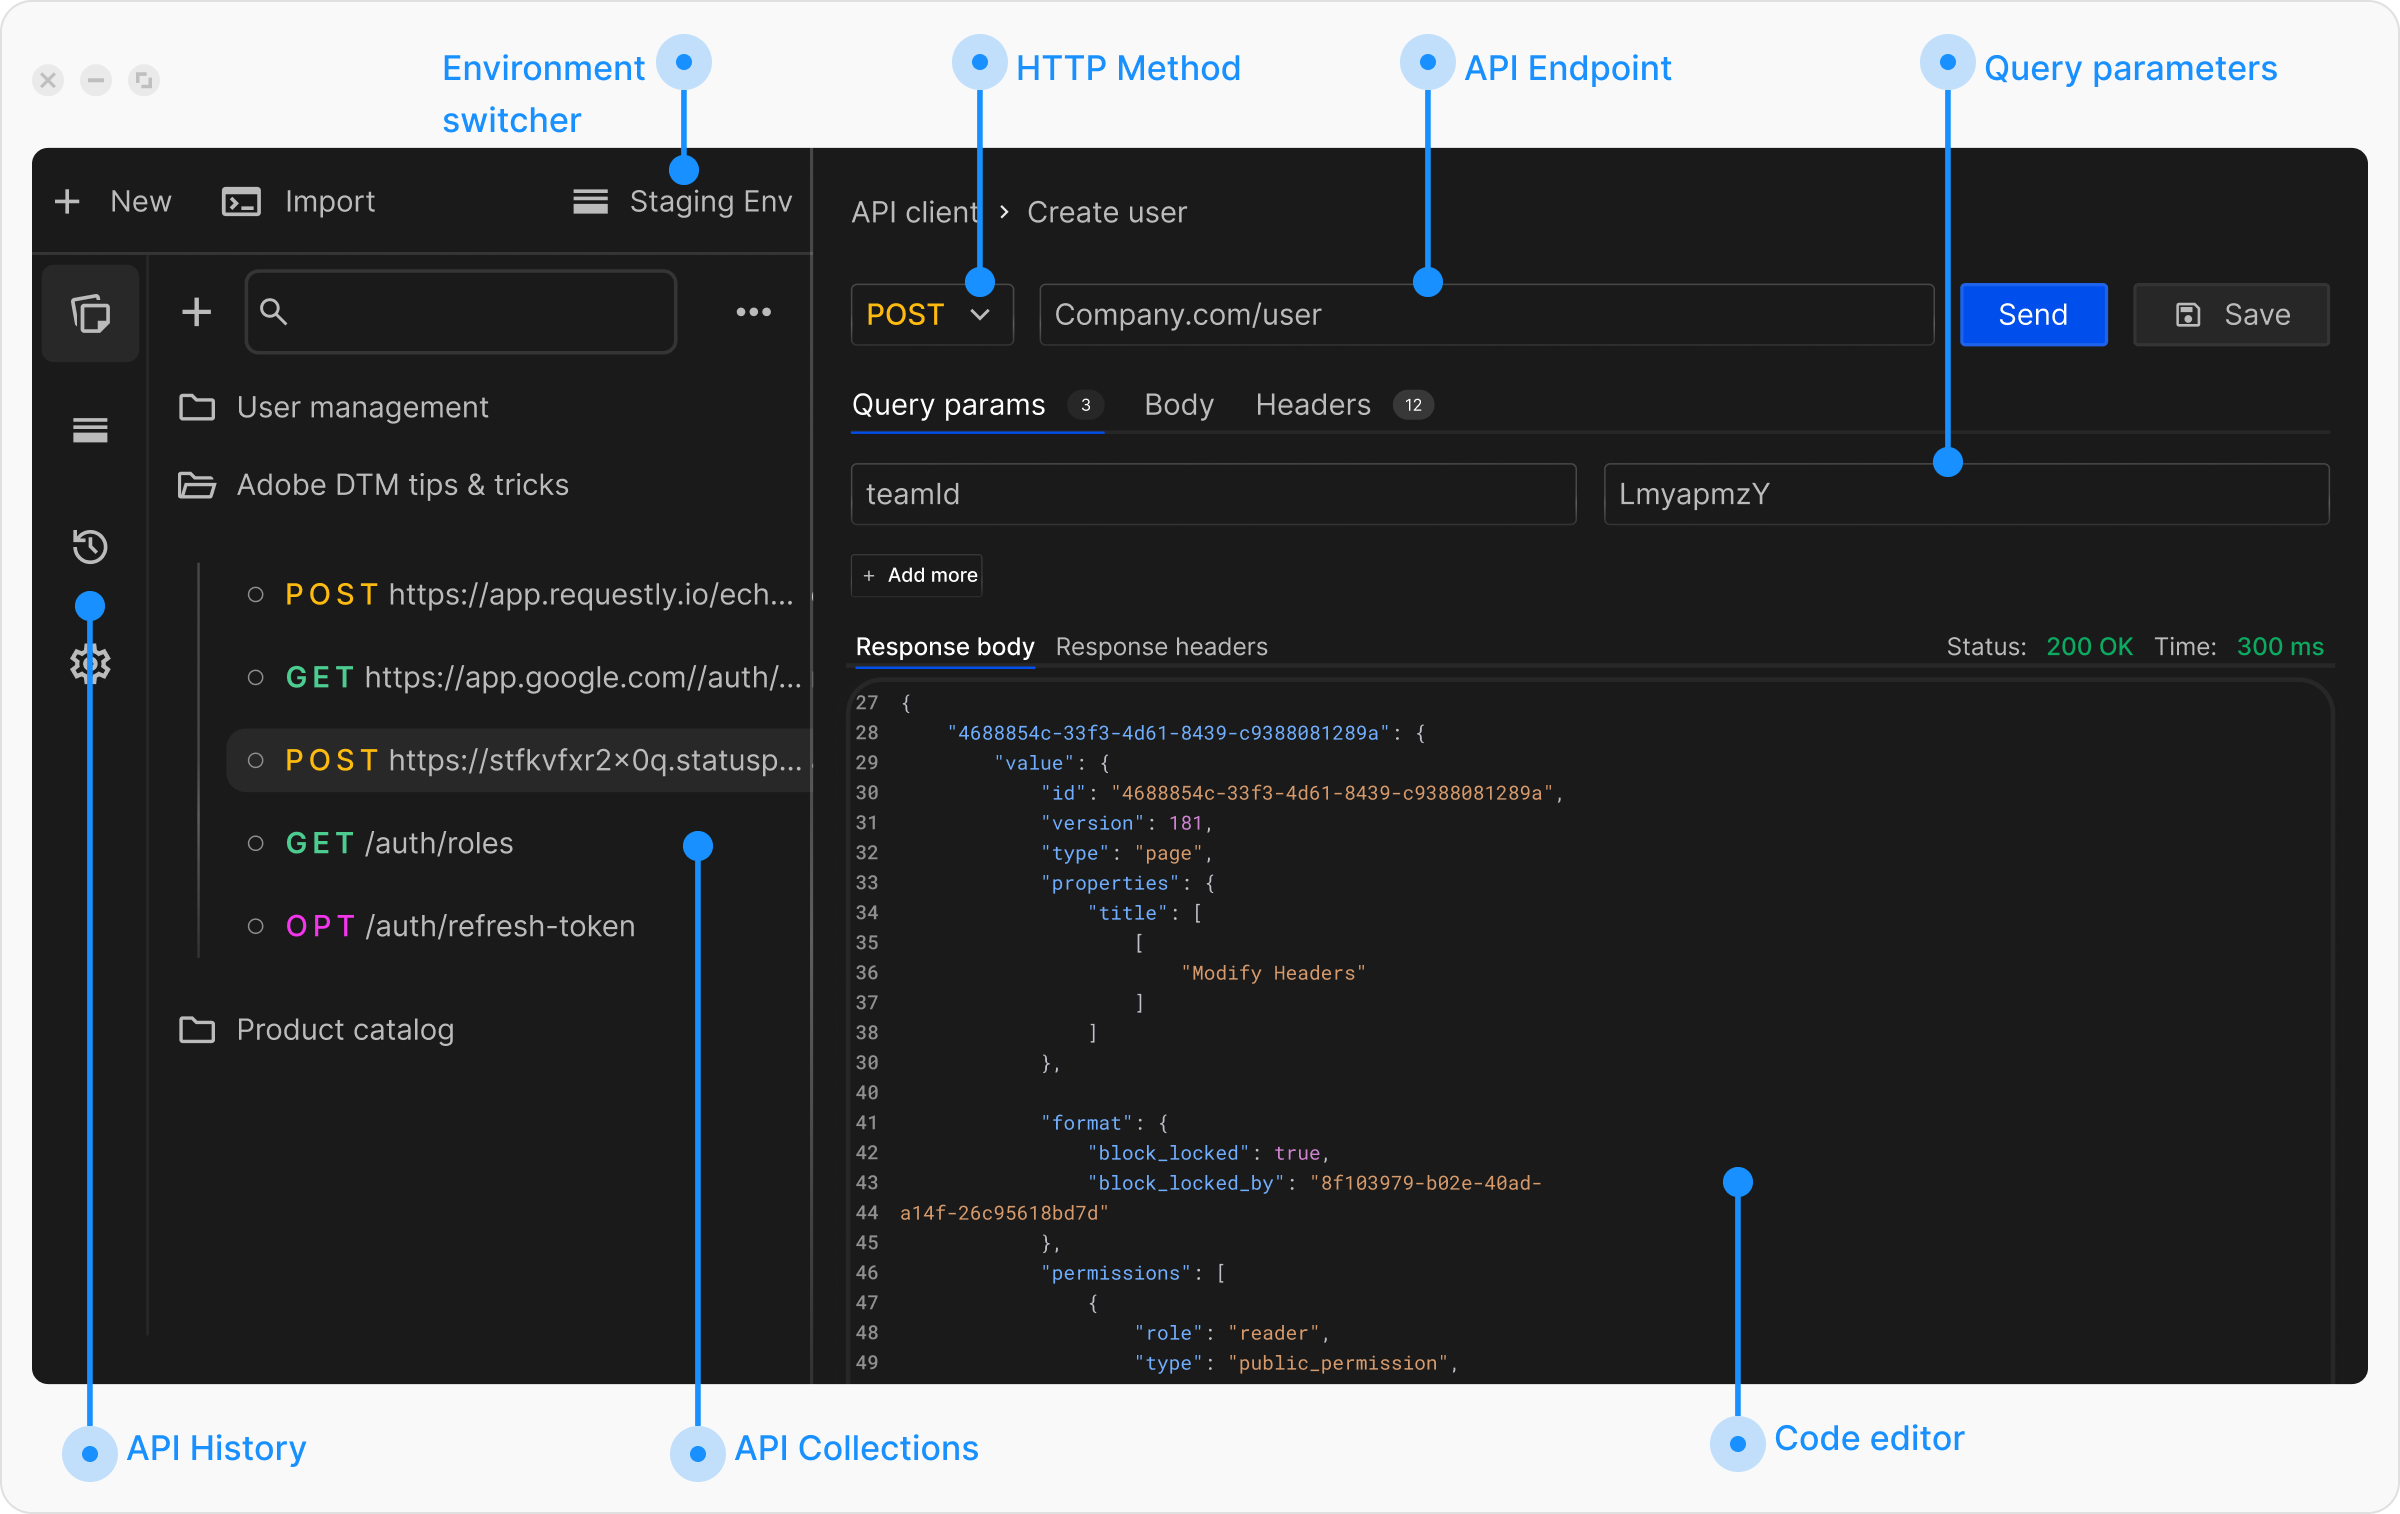 ## **Send Your First API Request**
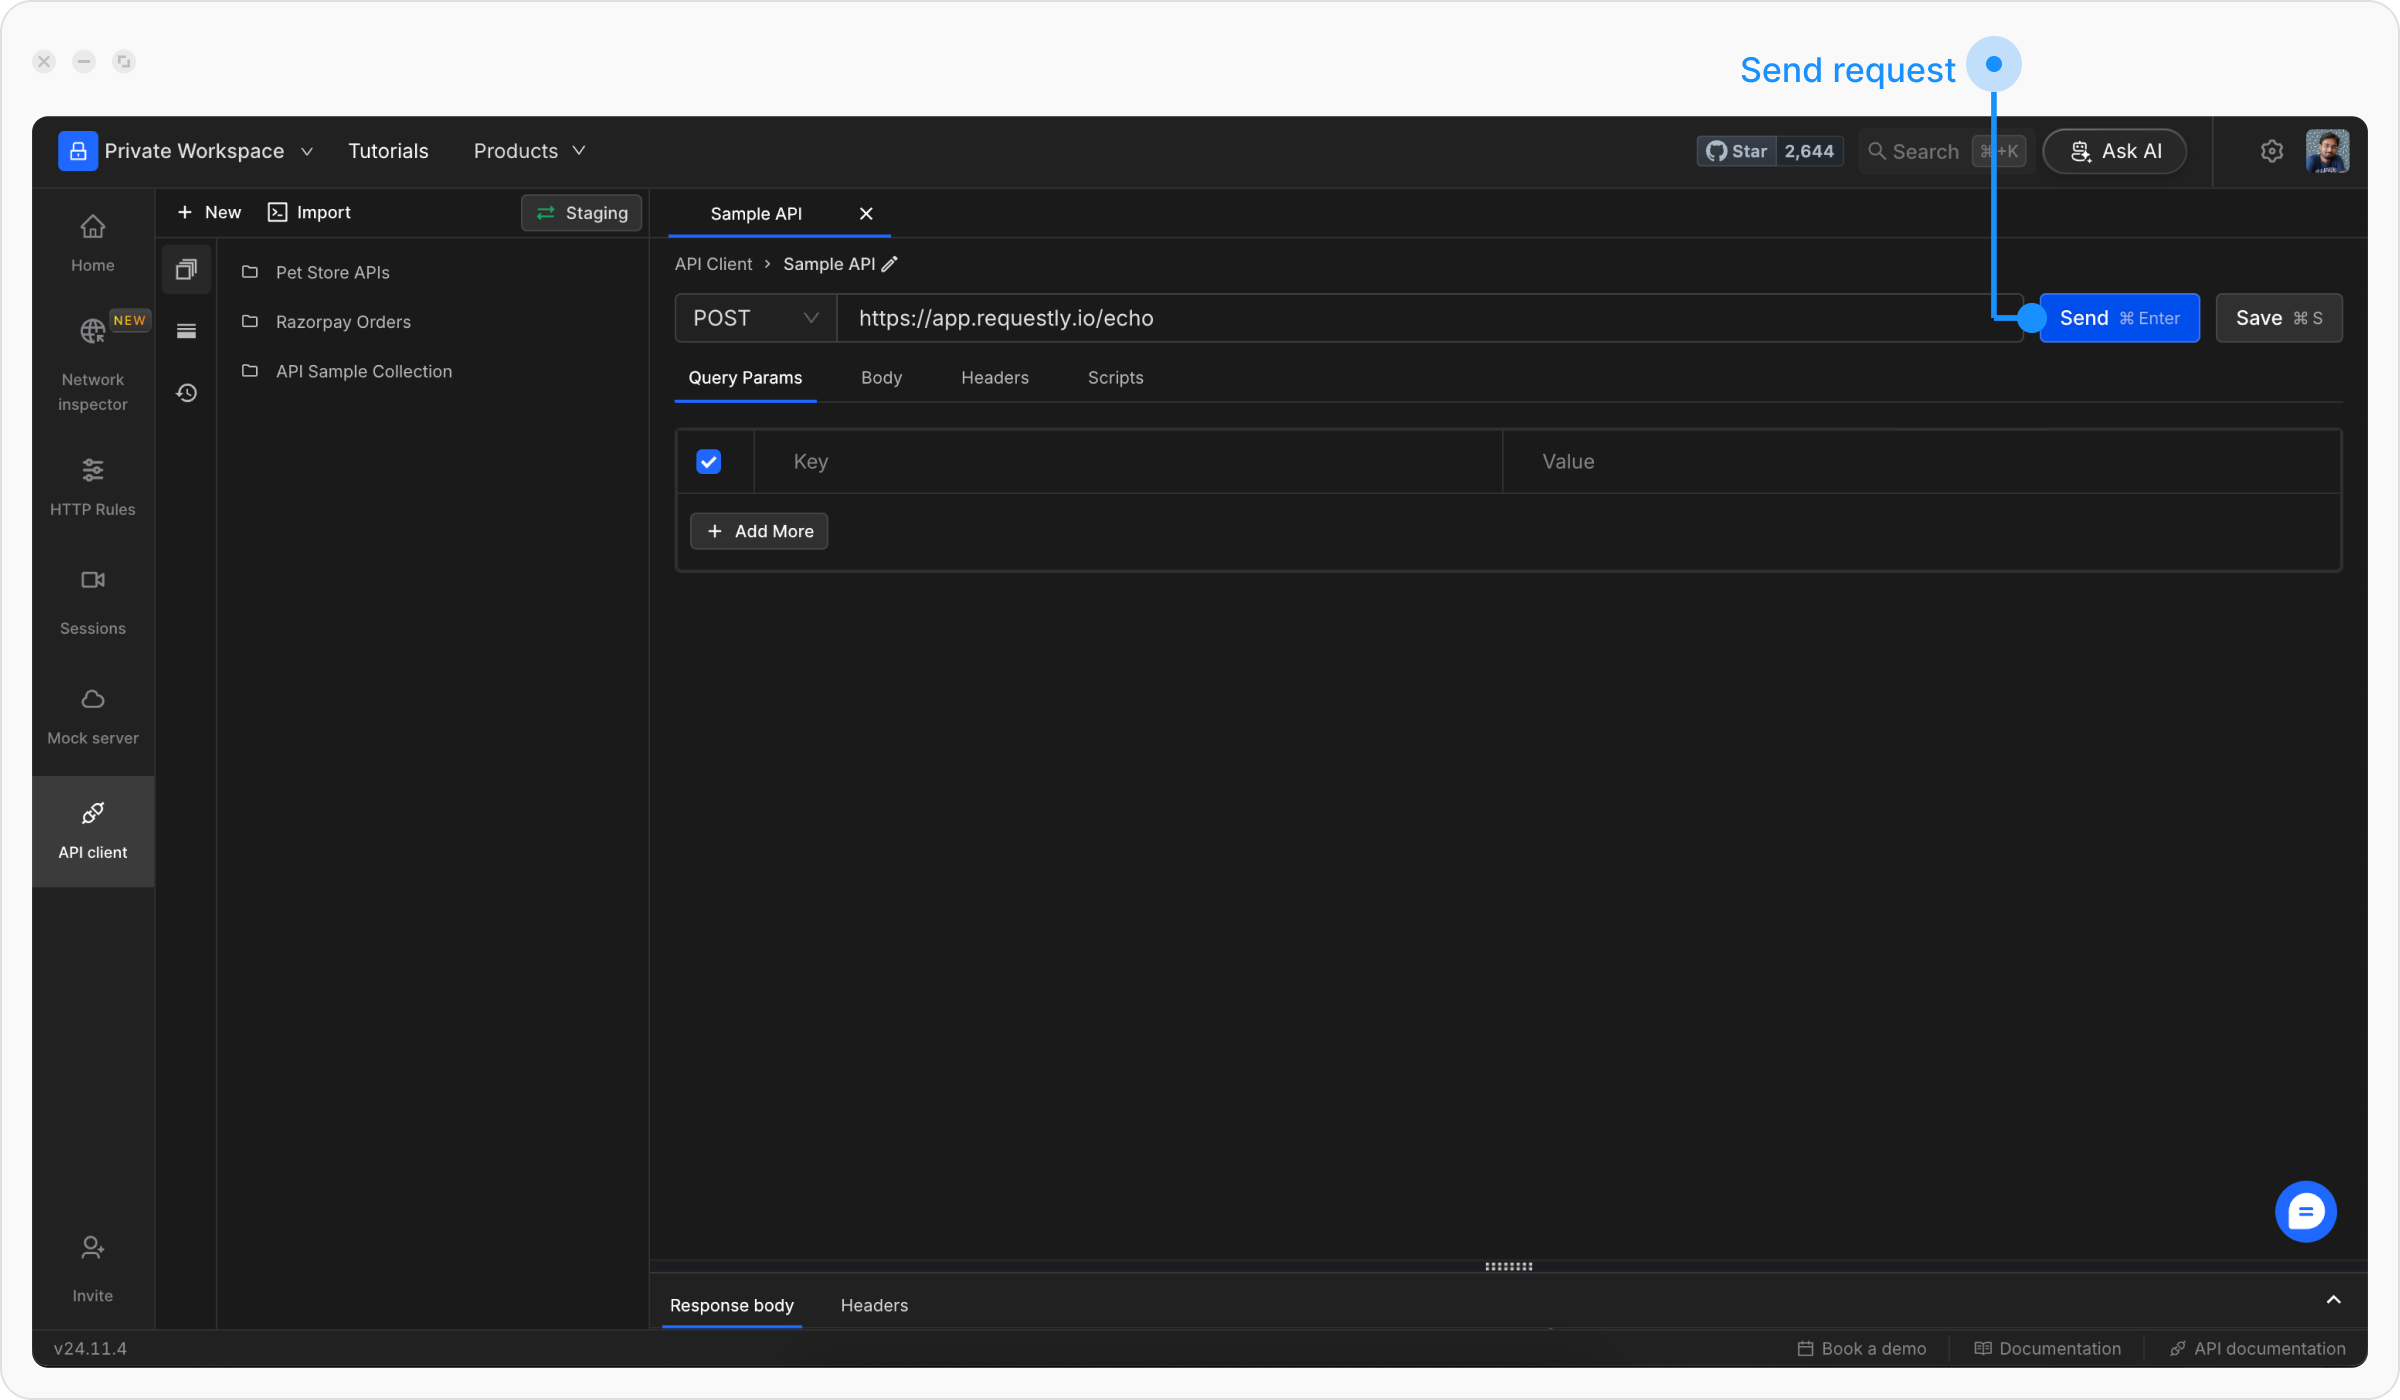
Click the **API Client** link in the left sidebar of the Requestly application, then click the `+ New` button to create a new request and select **Request** from the menu.
## **Send Your First API Request**
Click the **API Client** link in the left sidebar of the Requestly application, then click the `+ New` button to create a new request and select **Request** from the menu.
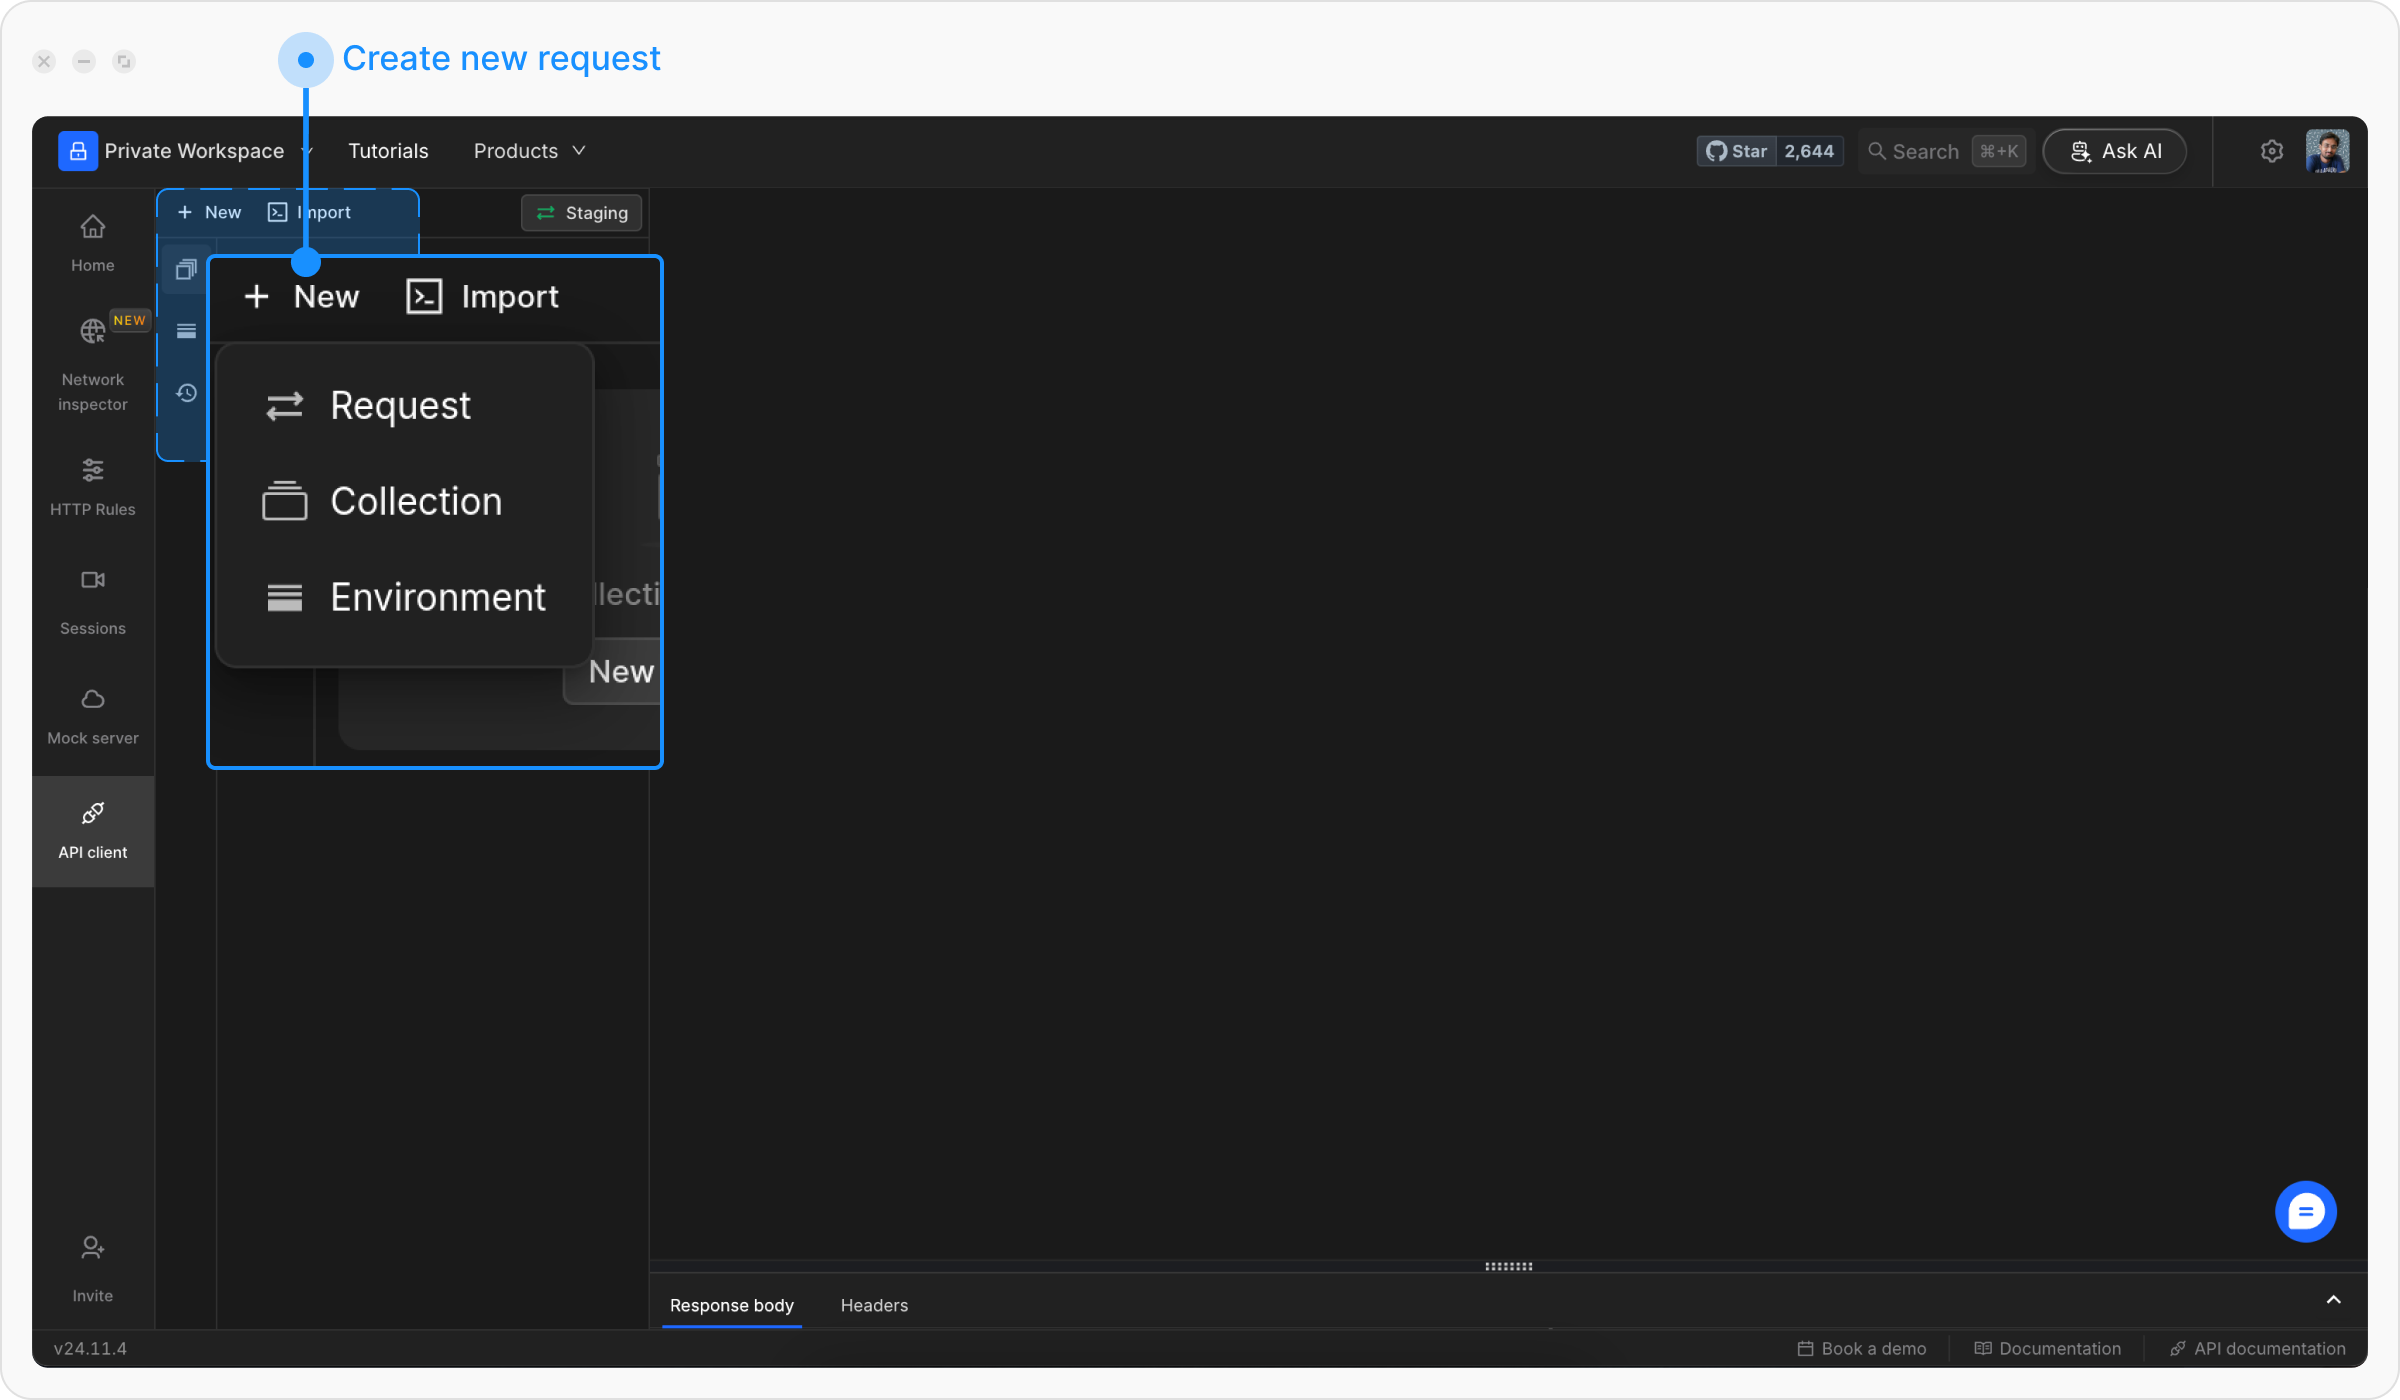 Choose a descriptive title for your request to make it easy to identify later.
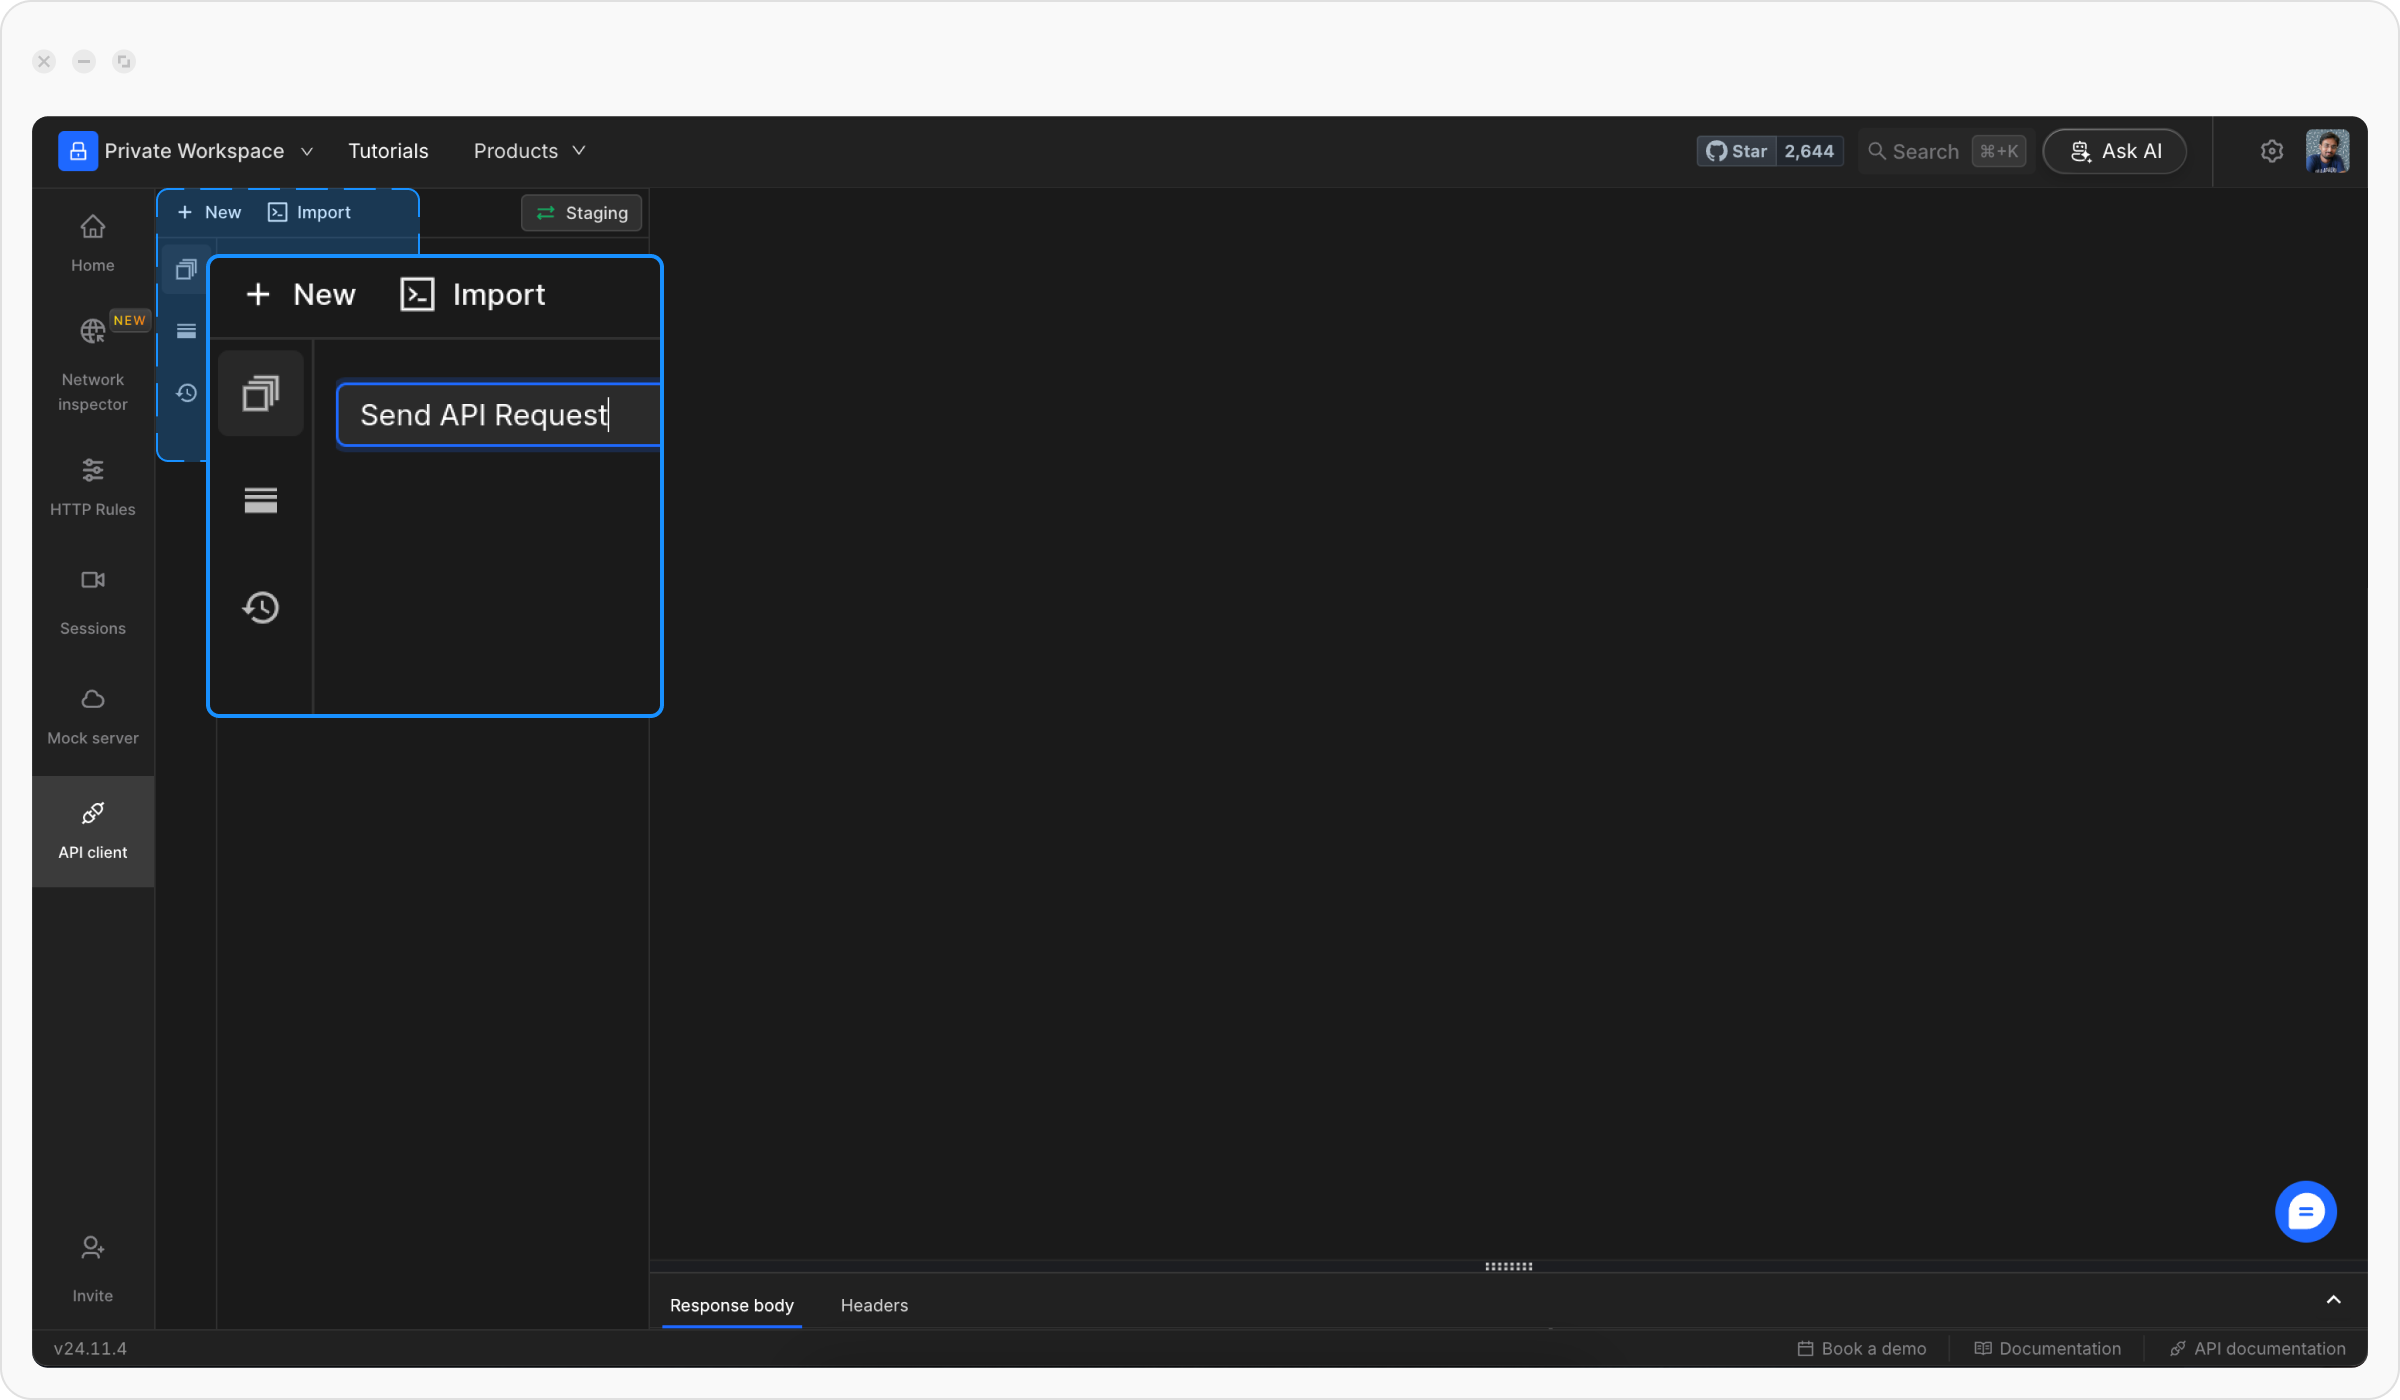 Pick the HTTP method (e.g., GET, POST) and type the URL of the API you want to test.
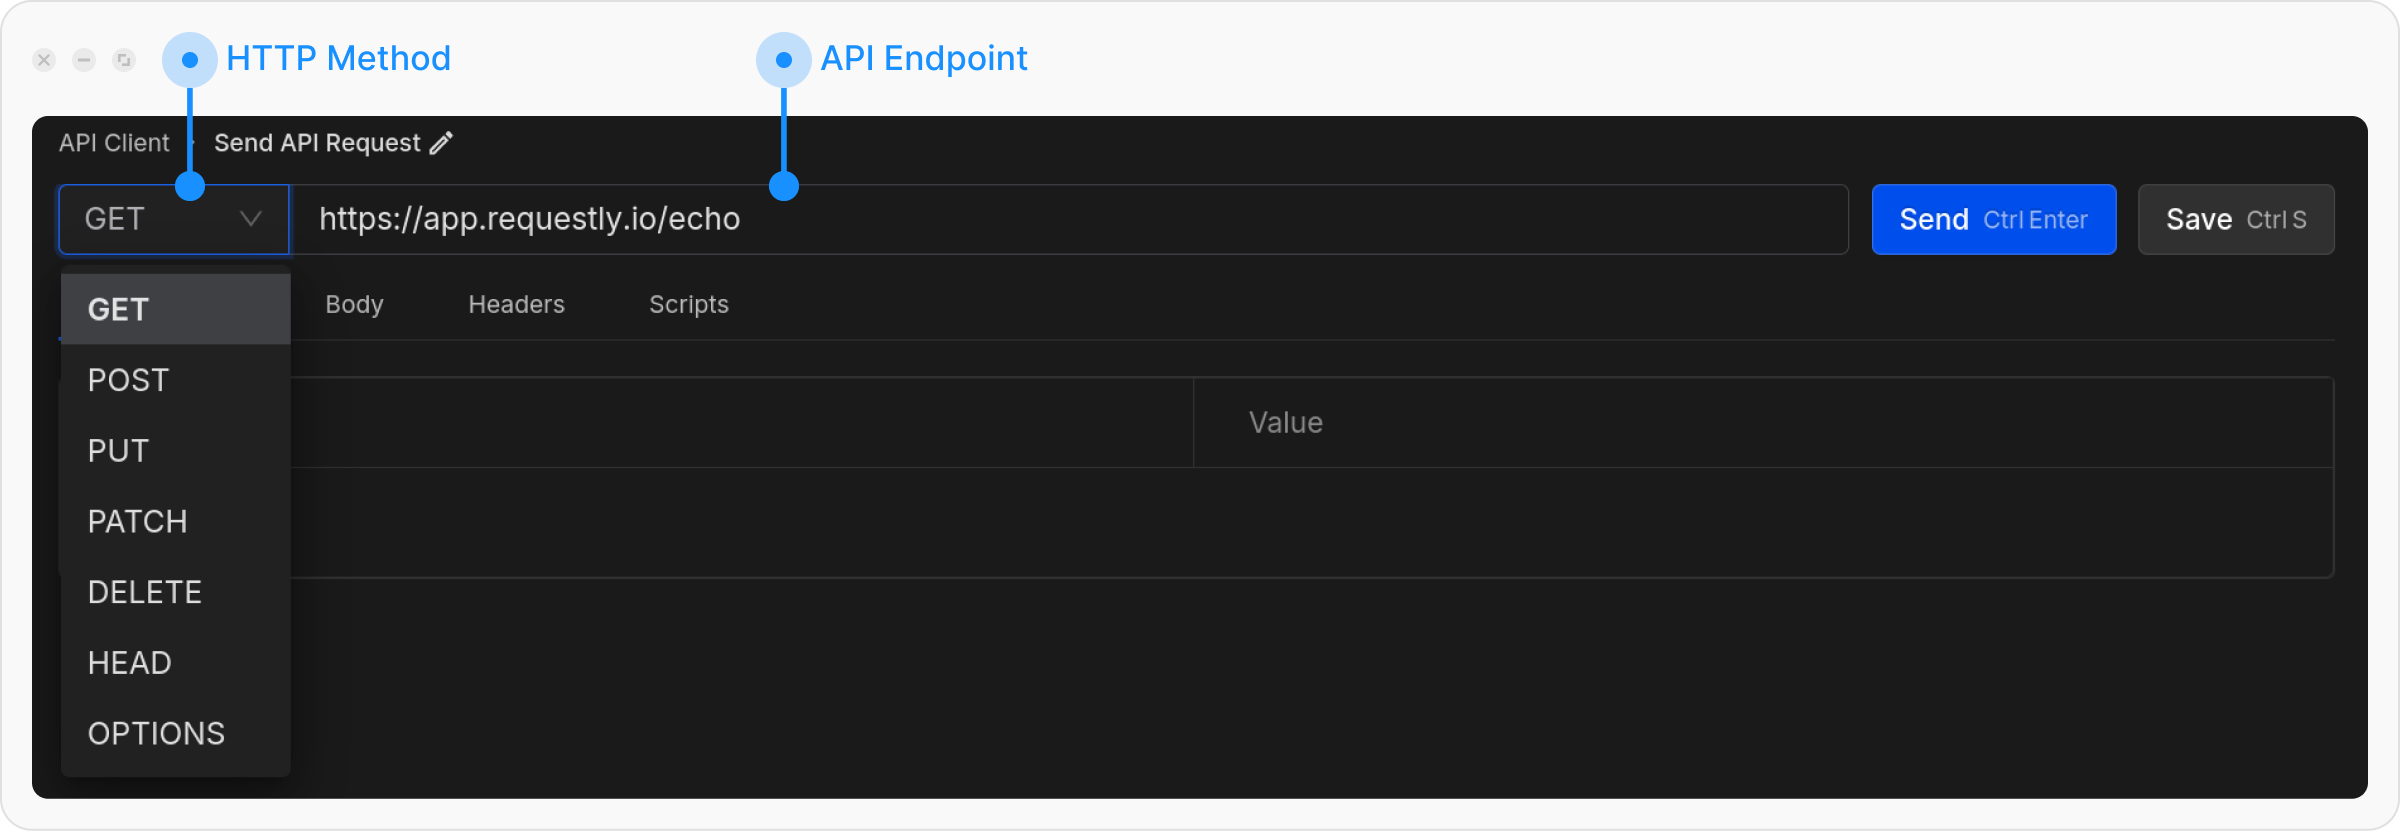 Click the **Save** & **Send** button to execute your request.
 ***
## **Response**
### **1. View the Response Body**
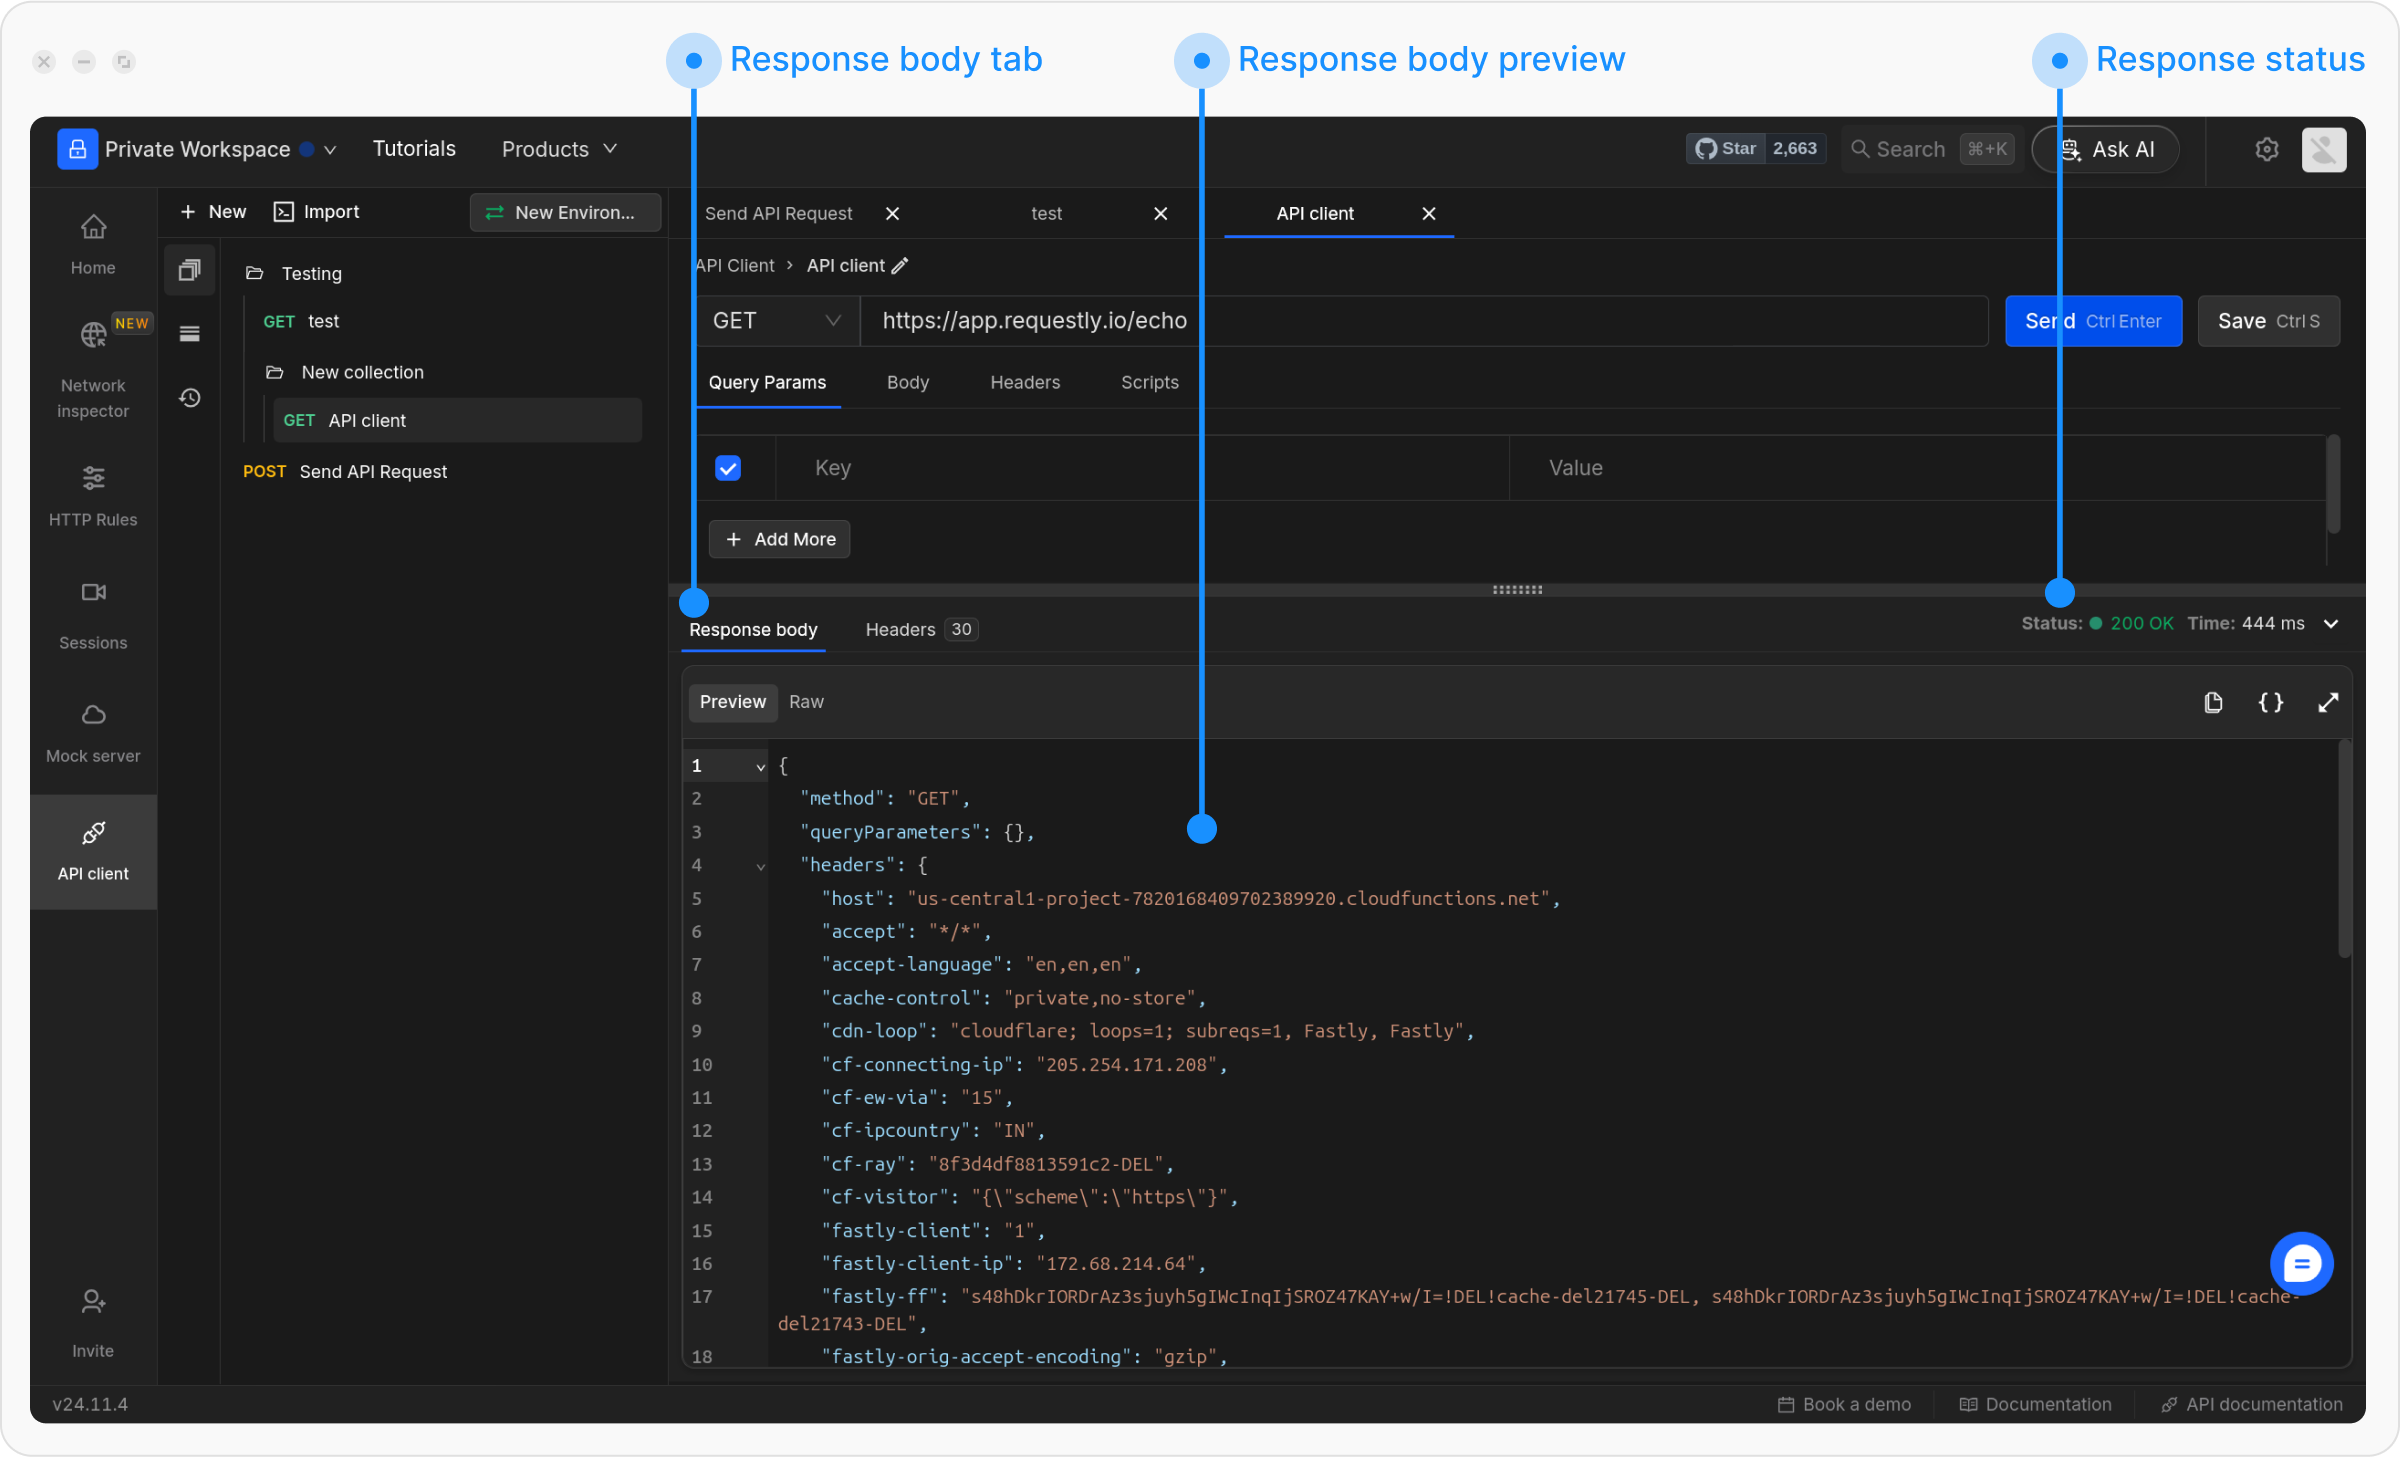
Once the request is sent, check the response body in the **Response Body** section. You can switch between formatted (pretty) and raw views.
***
## **Response**
### **1. View the Response Body**
Once the request is sent, check the response body in the **Response Body** section. You can switch between formatted (pretty) and raw views.
 ### **2. Check the Response Headers**
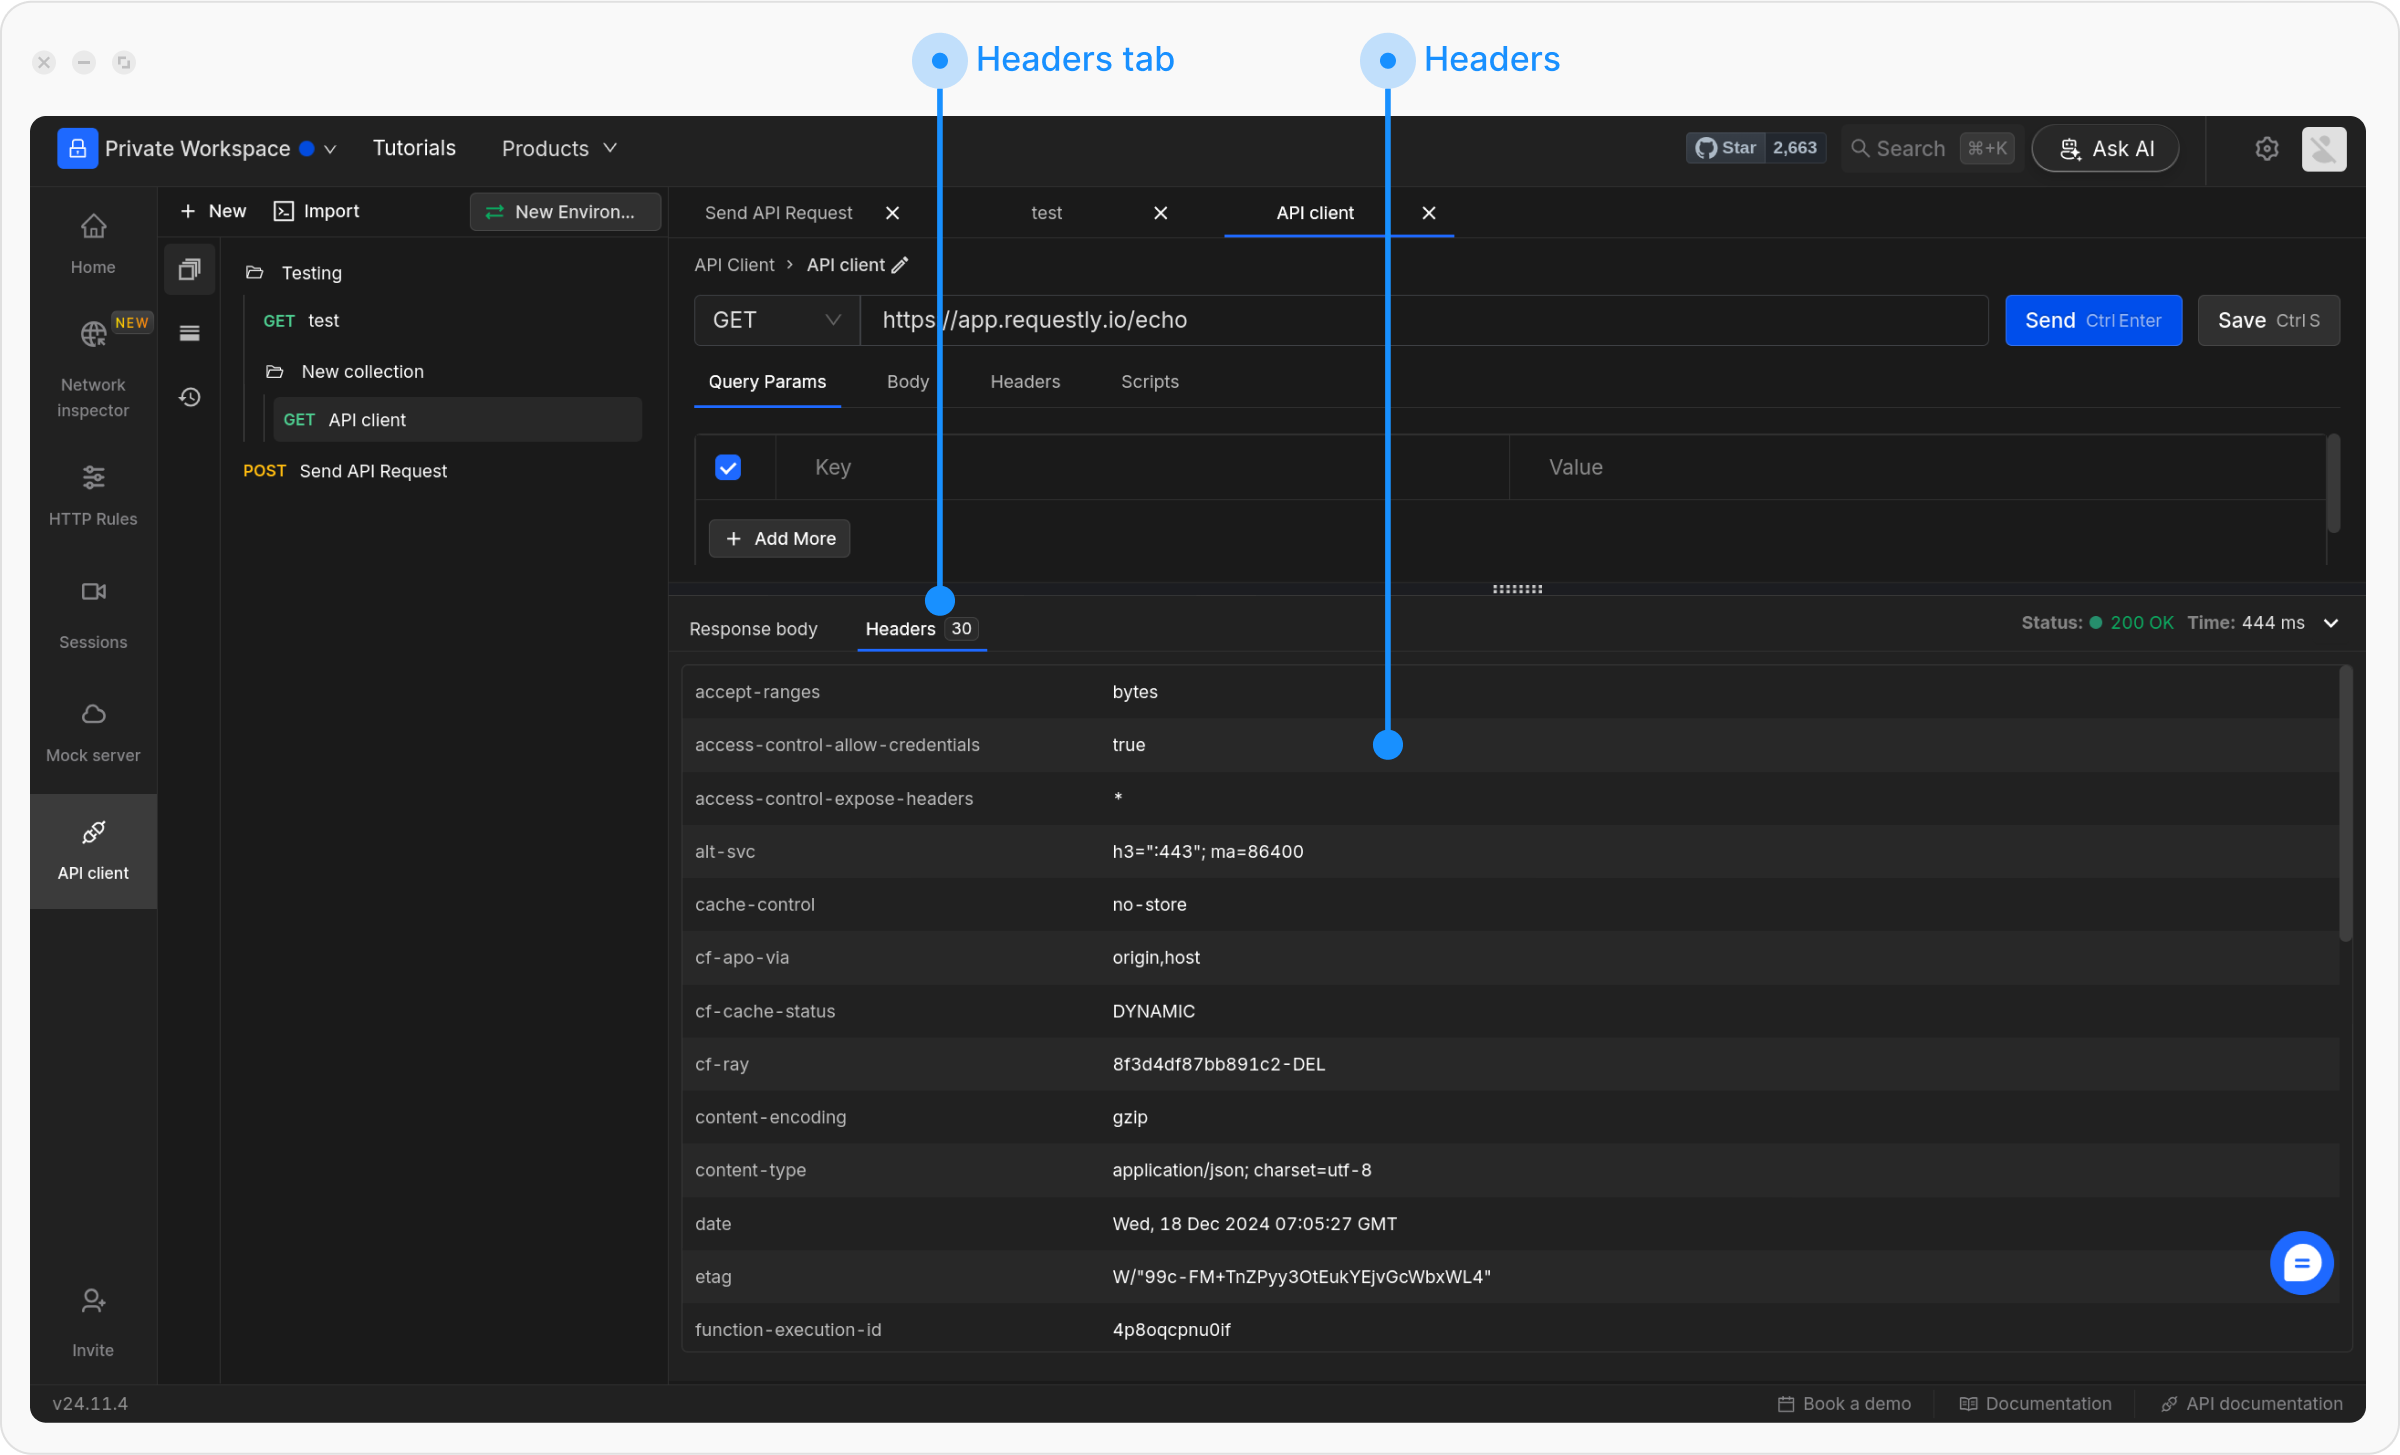
Review the headers sent back by the server in the **Headers** tab.
### **2. Check the Response Headers**
Review the headers sent back by the server in the **Headers** tab.
 ***
## Query Parameters
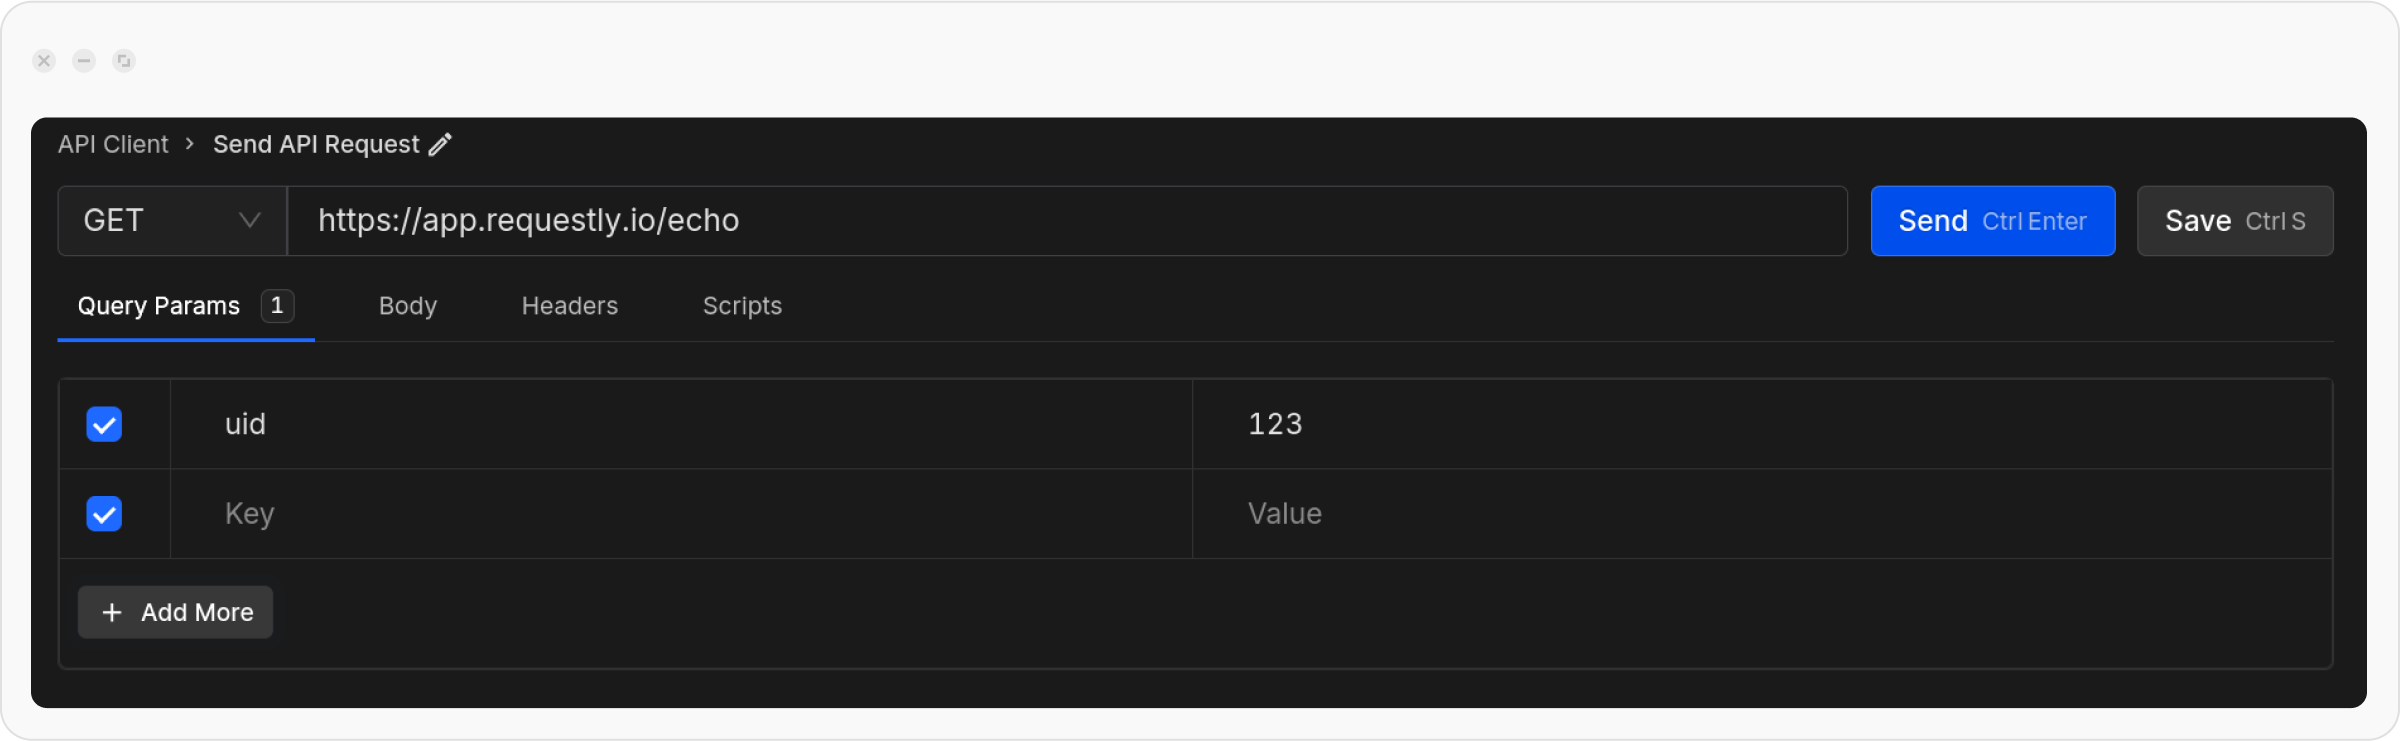
In the **Query Params** section, you can add query parameters as **key-value pairs** to send extra information with the URL. To add more parameters, click on the `+ Add More` button.
For example:
* Adding `uid=123` to `https://app.requestly.io/echo` results in: `https://app.requestly.io/echo?uid=123`
The checkboxes next to each parameter let you include or exclude them without deleting them. For instance, if you uncheck the `Key` parameter, the final URL will not include it
***
## Query Parameters
In the **Query Params** section, you can add query parameters as **key-value pairs** to send extra information with the URL. To add more parameters, click on the `+ Add More` button.
For example:
* Adding `uid=123` to `https://app.requestly.io/echo` results in: `https://app.requestly.io/echo?uid=123`
The checkboxes next to each parameter let you include or exclude them without deleting them. For instance, if you uncheck the `Key` parameter, the final URL will not include it
 ***
## Request Body
For POST or PUT requests, use the **Body** tab to send data
### Supported Form Types
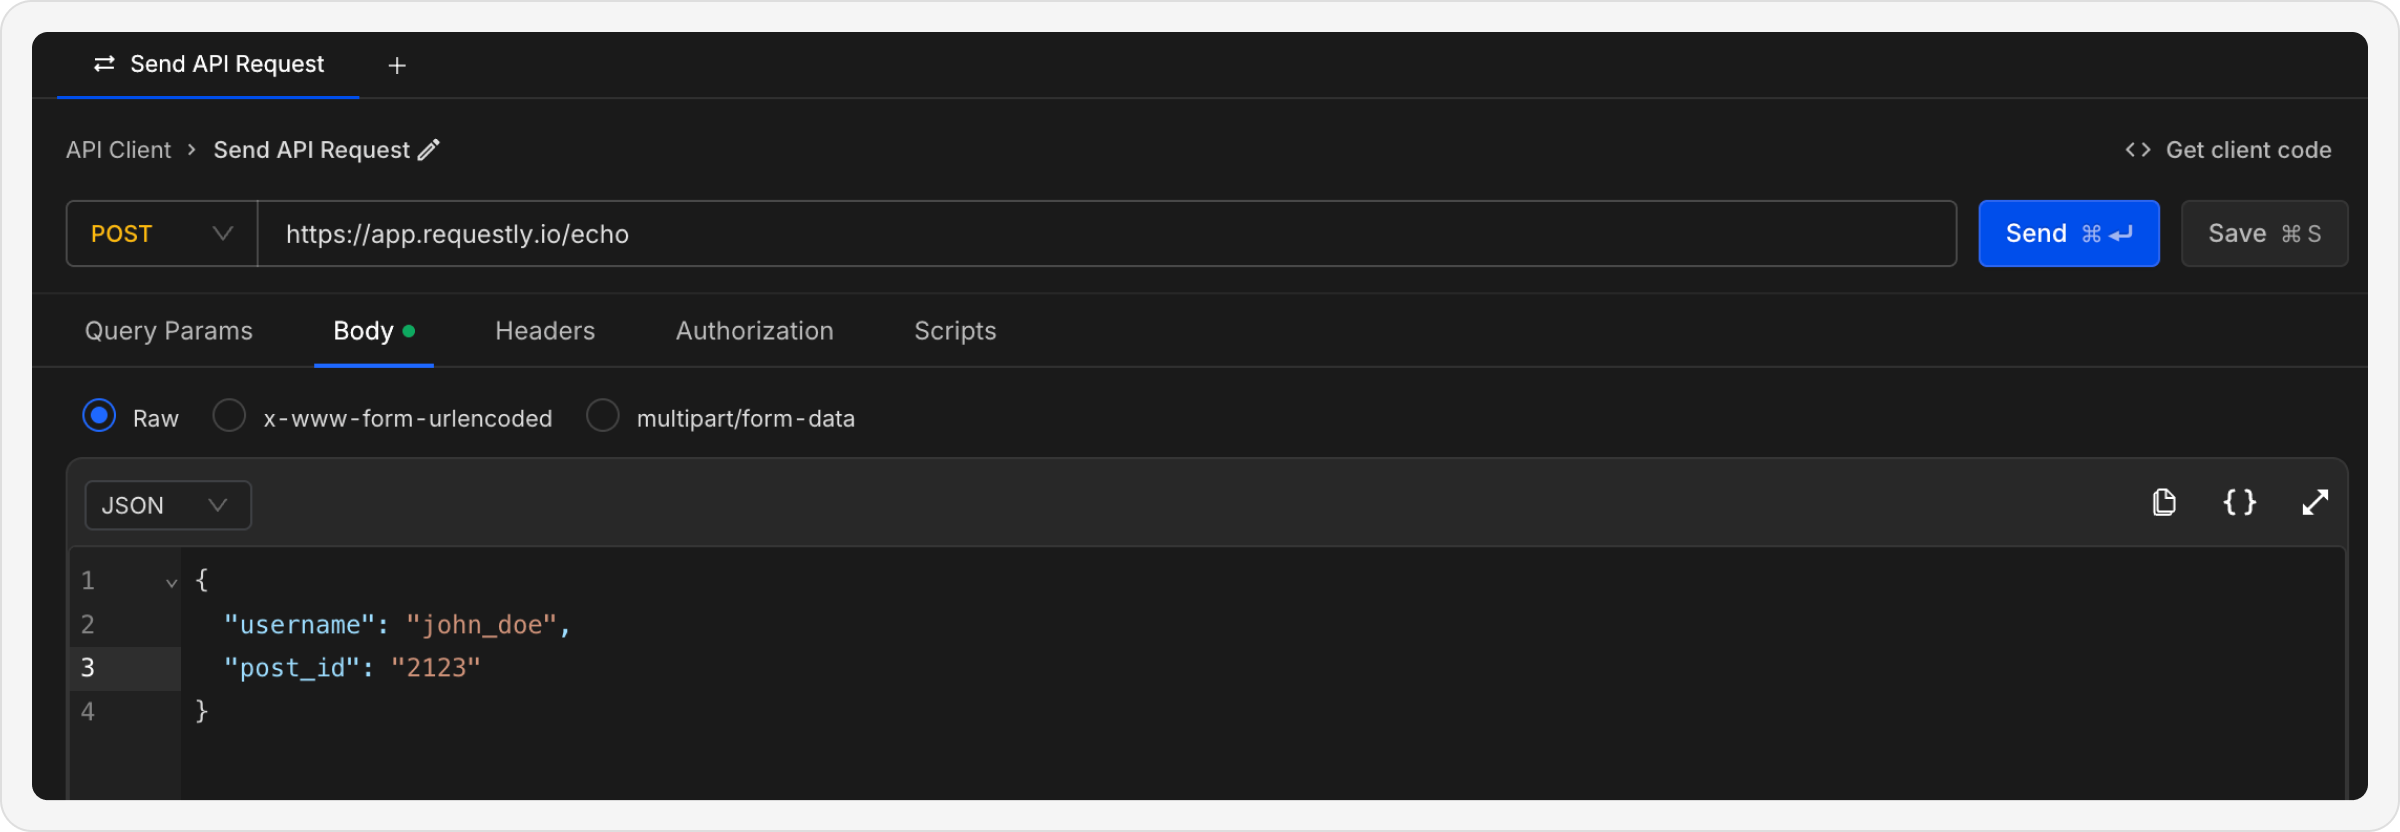
1. **RAW**
* Send raw data as plain **text** or structured **JSON**.
* You can select the language:
**JSON** – for structured data like API payloads.\
**Text** – for plain string or unstructured data
***
## Request Body
For POST or PUT requests, use the **Body** tab to send data
### Supported Form Types
1. **RAW**
* Send raw data as plain **text** or structured **JSON**.
* You can select the language:
**JSON** – for structured data like API payloads.\
**Text** – for plain string or unstructured data
 2. **x-www-form-urlencoded**
* Sends data as URL-encoded key-value pairs.
* Commonly used for web for
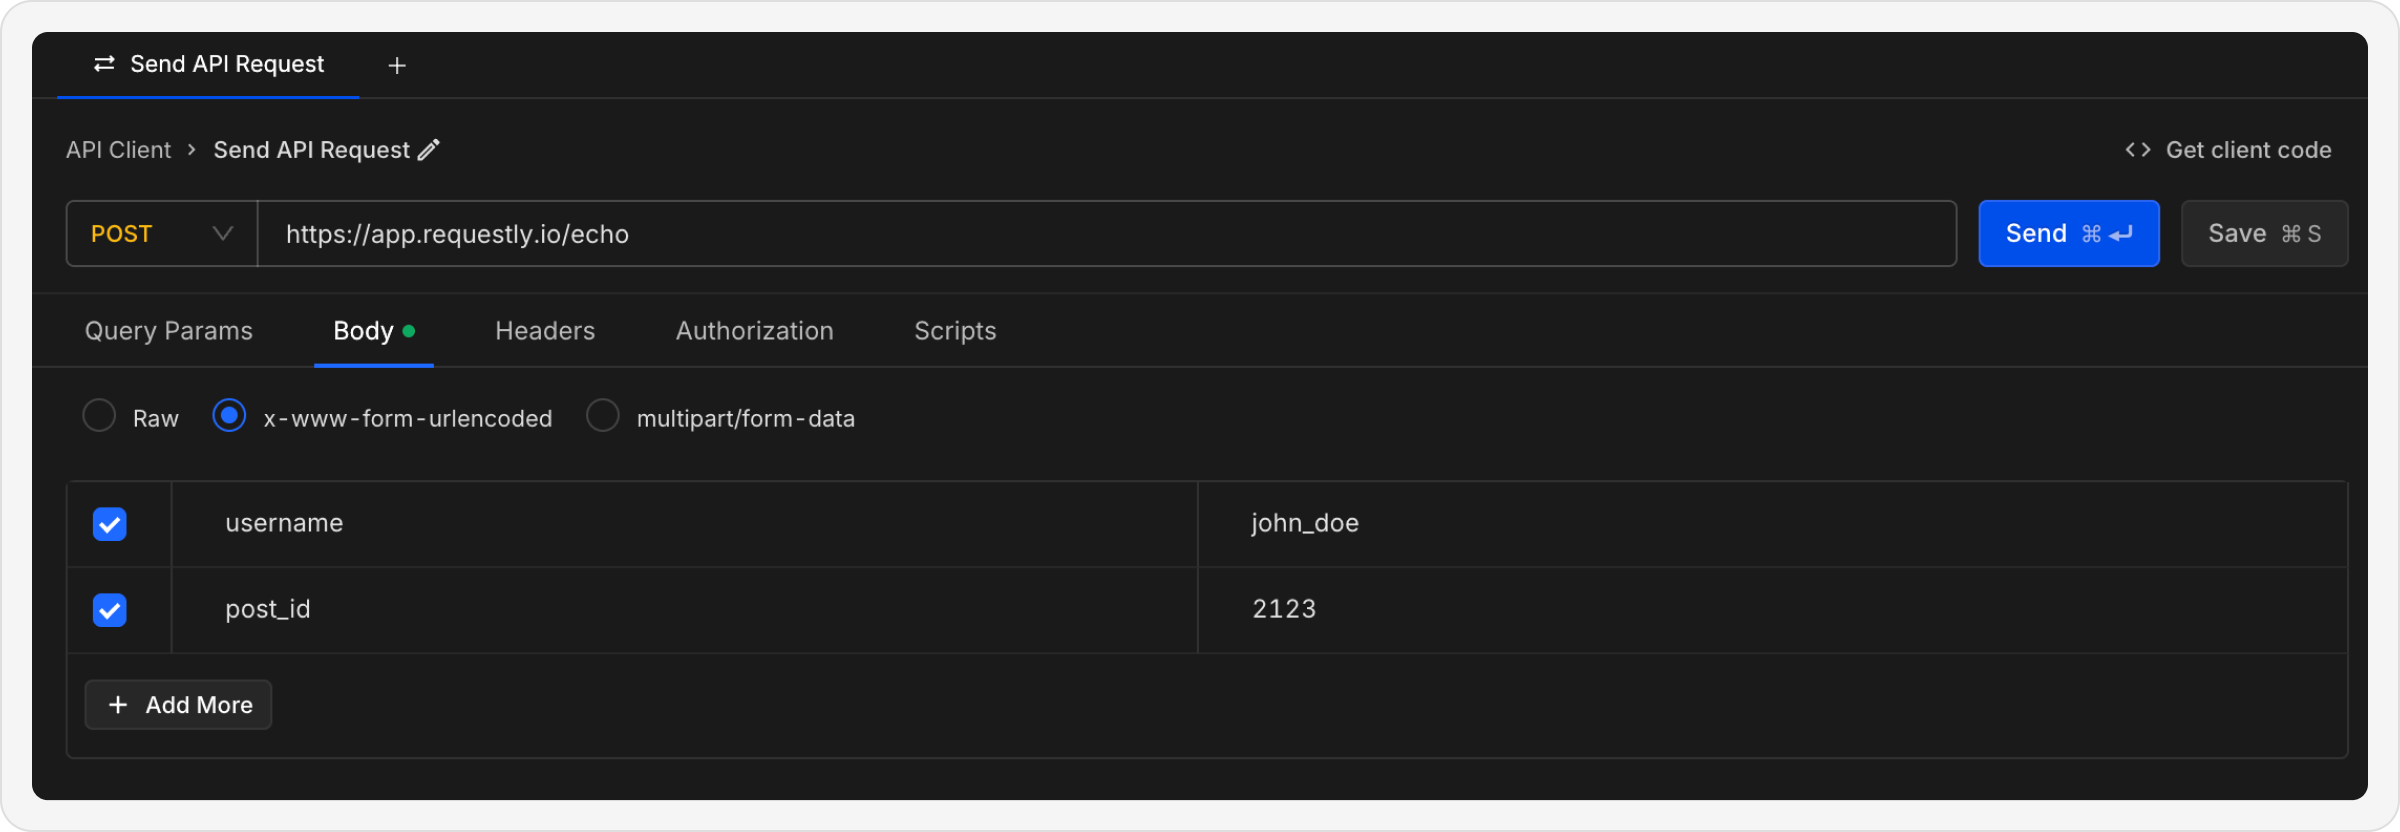
2. **x-www-form-urlencoded**
* Sends data as URL-encoded key-value pairs.
* Commonly used for web for
 3. **multipart/form-data**
* Used when uploading files along with form fields.
* Each field is sent as a separate part of the request body.
* Example use case: Uploading an image along with user detail
3. **multipart/form-data**
* Used when uploading files along with form fields.
* Each field is sent as a separate part of the request body.
* Example use case: Uploading an image along with user detail
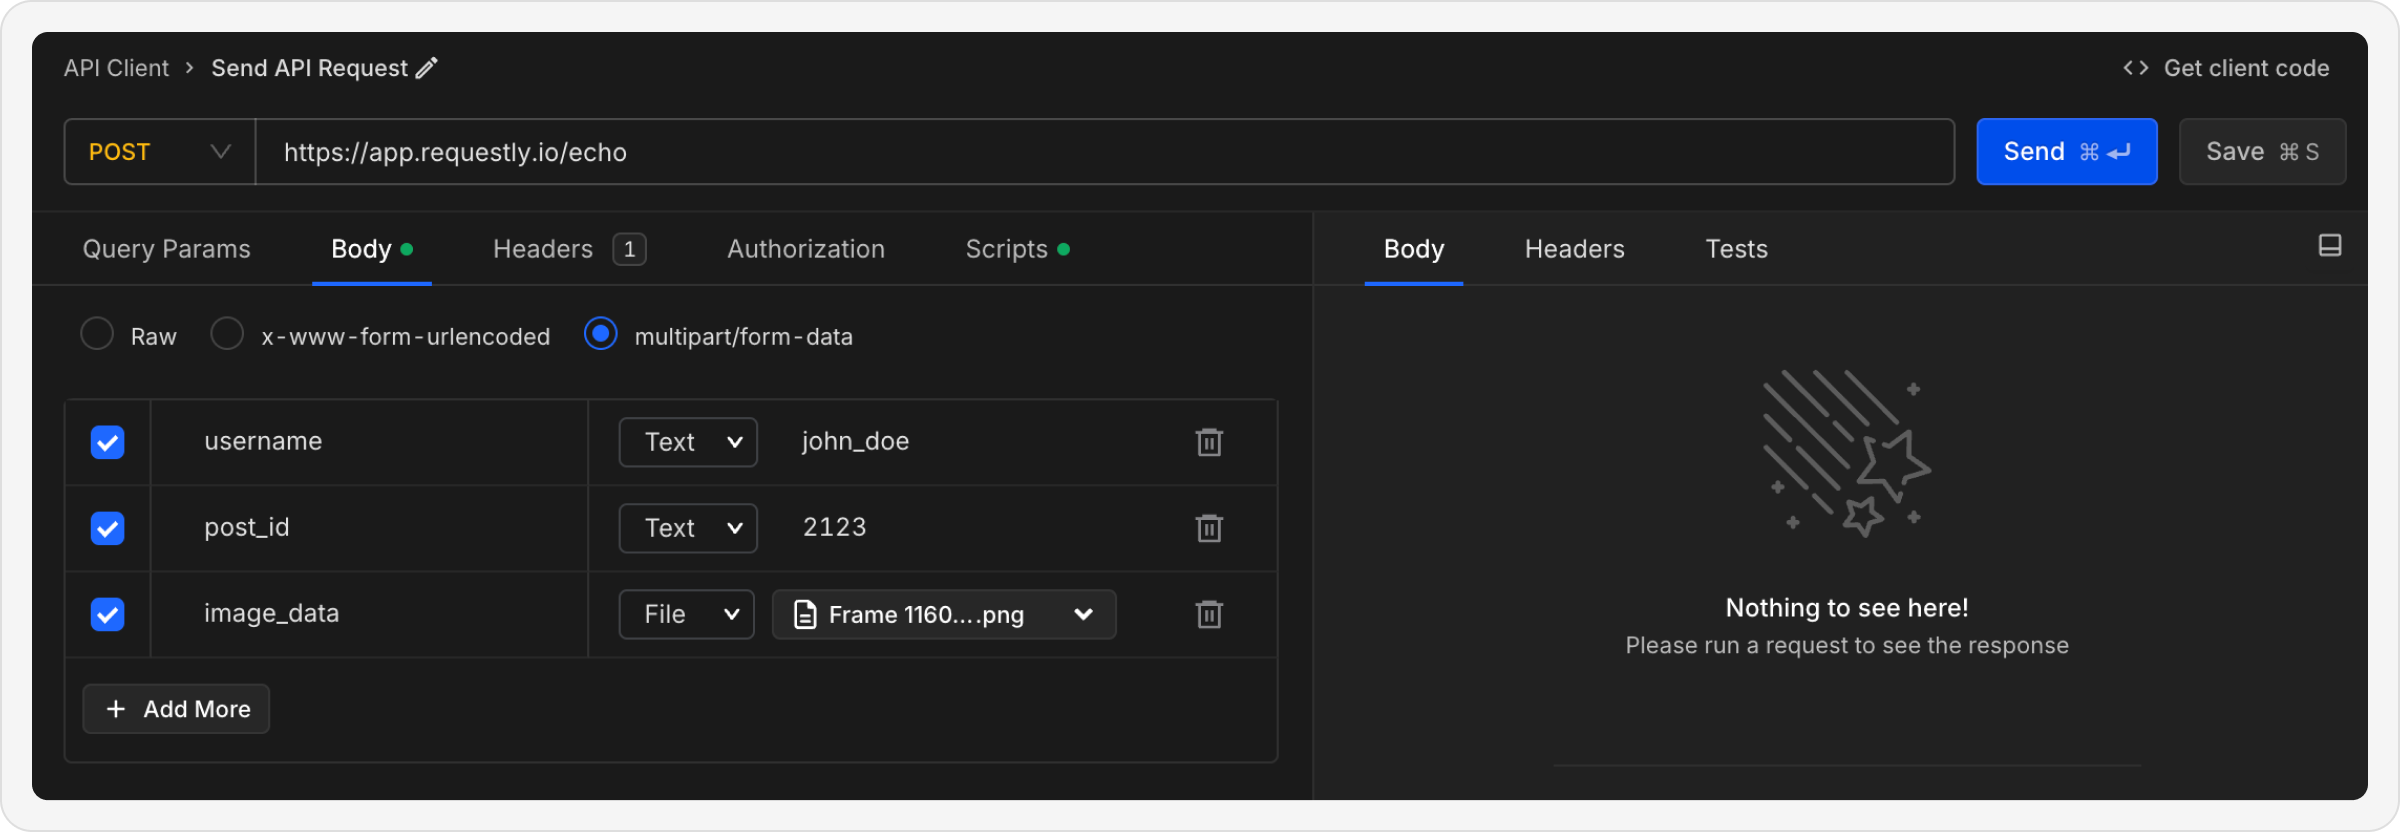 > 💡 Tip: For both `x-www-form-urlencoded` and `multipart/form-data`, you can add fields using the key-value form editor. If you need to send files, choose **multipart/form-data**.
***
## Headers
The **Headers** tab allows you to include additional information in your API request. Headers are key-value pairs that provide essential details for the request, such as authentication tokens, content type, or other metadata required by the API. To add more headers, click on the `+ Add More` button.
For example: You can add headers like `Authorization: Bearer ` to authenticate your request, or `Content-Type: application/json` to specify the format of the data you're sending.
The checkboxes next to each parameter let you include or exclude them without deleting them. For instance, if you uncheck the `Key` parameter, the final URL will not include it
> 💡 Tip: For both `x-www-form-urlencoded` and `multipart/form-data`, you can add fields using the key-value form editor. If you need to send files, choose **multipart/form-data**.
***
## Headers
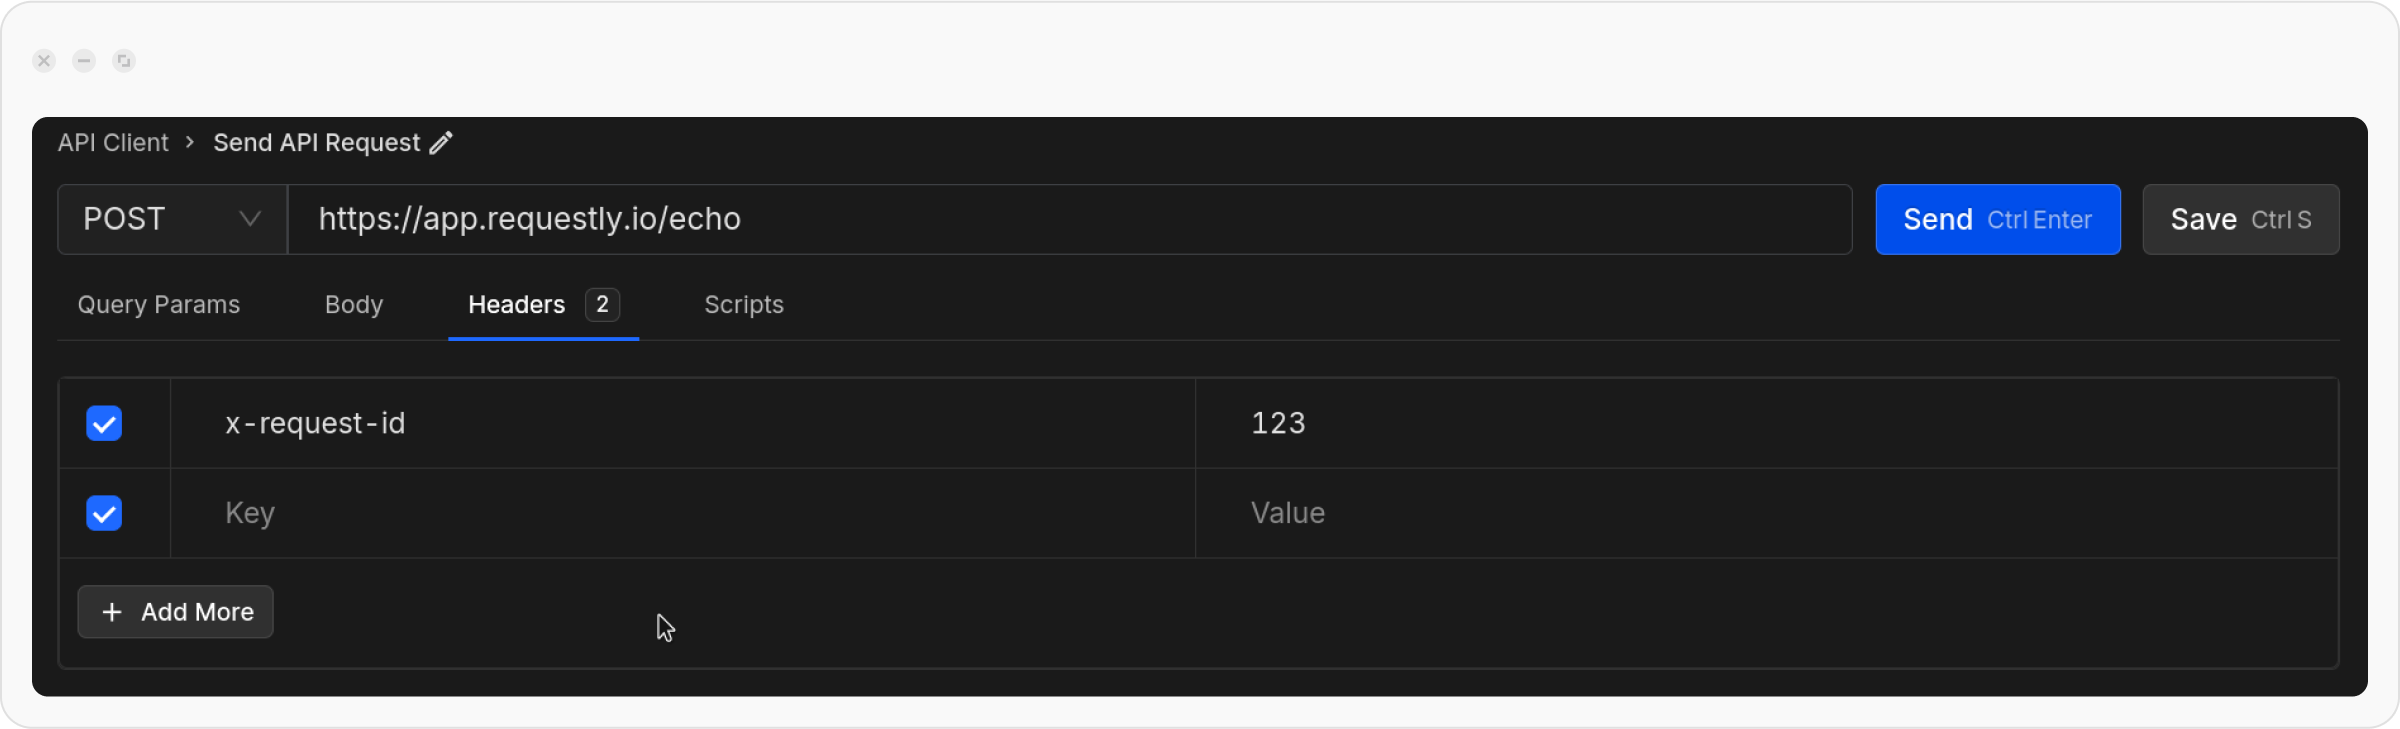
The **Headers** tab allows you to include additional information in your API request. Headers are key-value pairs that provide essential details for the request, such as authentication tokens, content type, or other metadata required by the API. To add more headers, click on the `+ Add More` button.
For example: You can add headers like `Authorization: Bearer ` to authenticate your request, or `Content-Type: application/json` to specify the format of the data you're sending.
The checkboxes next to each parameter let you include or exclude them without deleting them. For instance, if you uncheck the `Key` parameter, the final URL will not include it
 ***
## Scripts
* **Pre-Scripts**: Execute code before sending the request, like generating tokens or setting dynamic headers.
* **Post-Scripts**: Execute code after receiving the response, useful for processing or saving the response data.
***
## Scripts
* **Pre-Scripts**: Execute code before sending the request, like generating tokens or setting dynamic headers.
* **Post-Scripts**: Execute code after receiving the response, useful for processing or saving the response data.
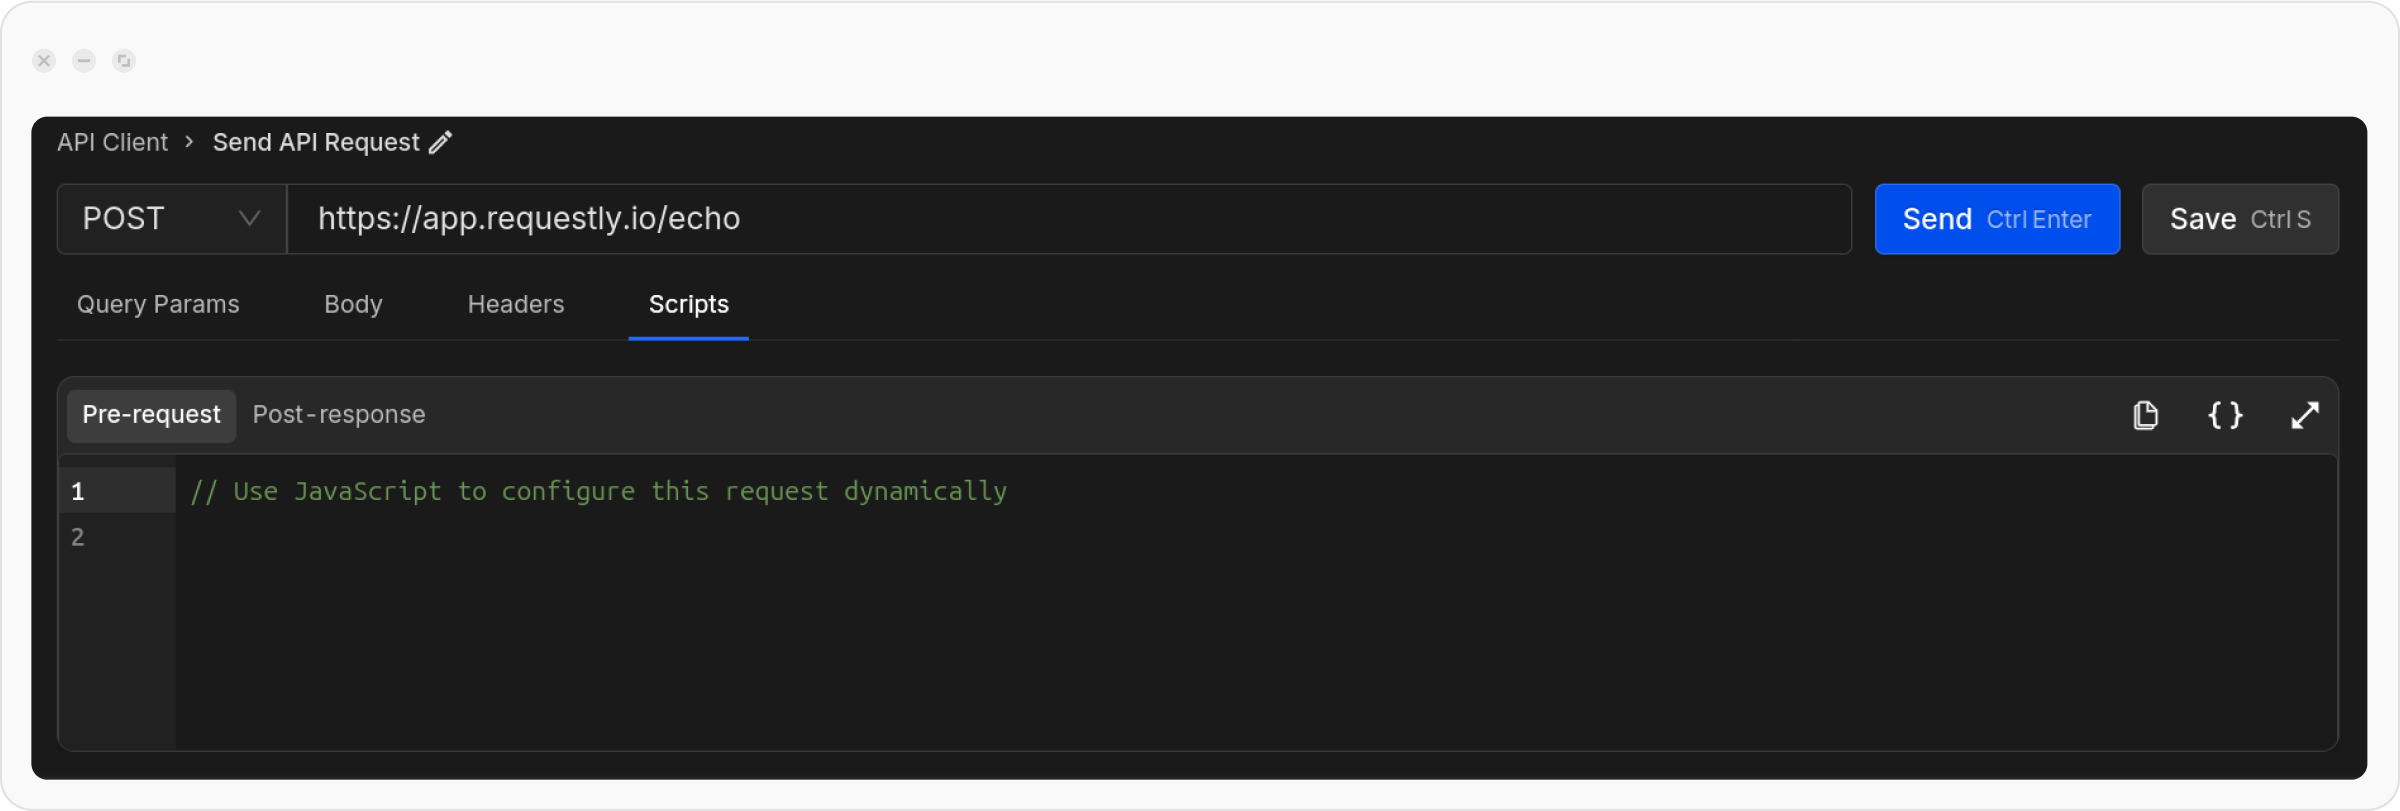 To learn more about using scripts visit Scripts Documentation.